• Which the release of FS2020 we see an explosition of activity on the forun and of course we are very happy to see this. But having all questions about FS2020 in one forum becomes a bit messy. So therefore we would like to ask you all to use the following guidelines when posting your questions:

    • Tag FS2020 specific questions with the MSFS2020 tag.
    • Questions about making 3D assets can be posted in the 3D asset design forum. Either post them in the subforum of the modelling tool you use or in the general forum if they are general.
    • Questions about aircraft design can be posted in the Aircraft design forum
    • Questions about airport design can be posted in the FS2020 airport design forum. Once airport development tools have been updated for FS2020 you can post tool speciifc questions in the subforums of those tools as well of course.
    • Questions about terrain design can be posted in the FS2020 terrain design forum.
    • Questions about SimConnect can be posted in the SimConnect forum.

    Any other question that is not specific to an aspect of development or tool can be posted in the General chat forum.

    By following these guidelines we make sure that the forums remain easy to read for everybody and also that the right people can find your post to answer it.

FSX Piper Comanche

Messages
60
Country
argentina
Hello, after several tries on modelling something (4th, to be honest) I finally reached something that's shaped like a plane. If you can't tell what it is (because of the modelling :p ), the plane is a Comanche. So far I'm happy with the result, I know it's not the best, and that the techniques used aren't the best also but well it's something.
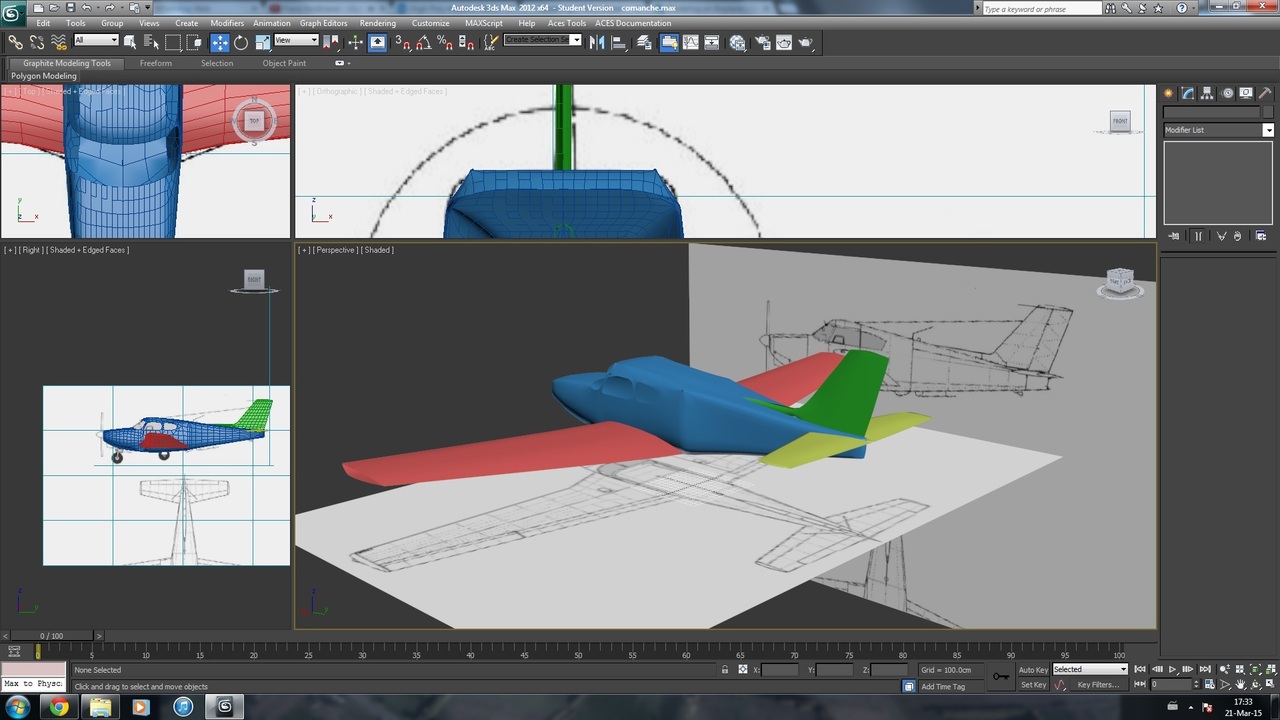
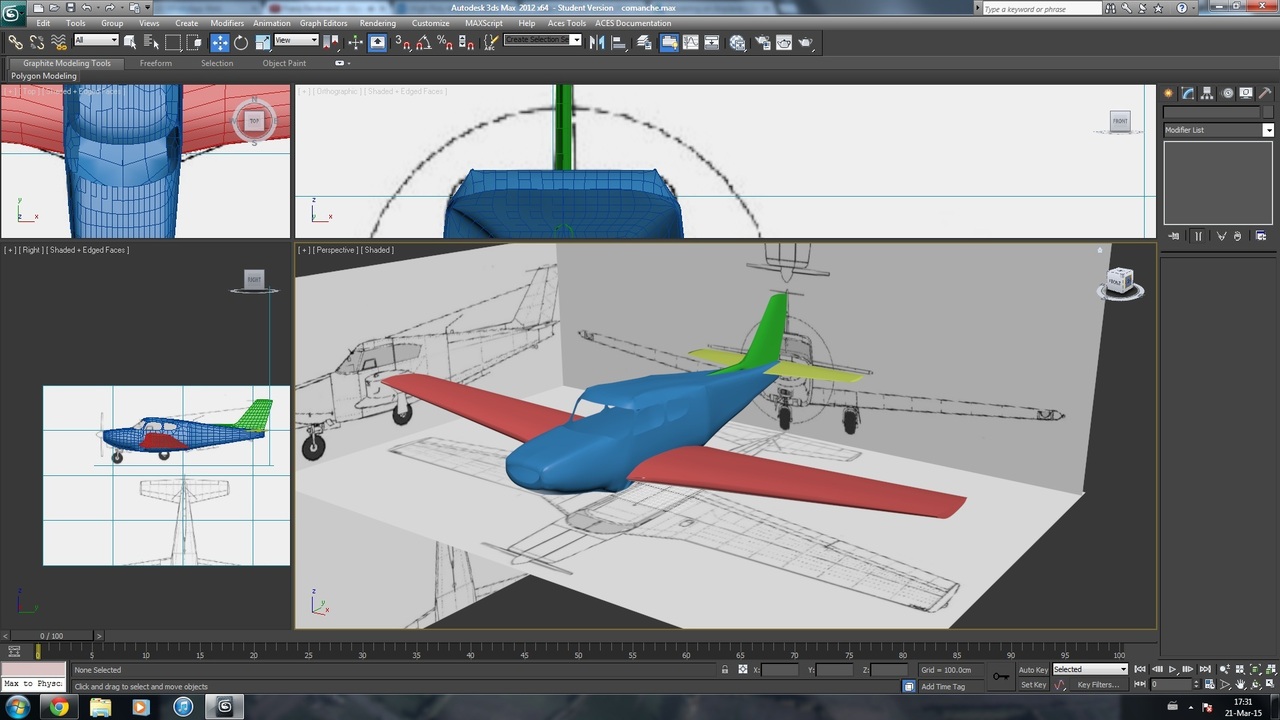
Stop talking this is an image of the plane


So, I got a couple of questions. For example, how to make sharp edges around the windows, because turbosmooth takes all with it. I have already turned crease to 1 and weight to 0, but still I want sharper edges. For example, is it possible to fill some gaps that "bridge" tool won't? I guess, so far this is it, I still have to mess around with landing gear, and control surfaces and see how to import it to FSX to see how good/bad it looks insim.

Any constructive criticism is accepted (have in mind this is the farthest I made it into a model).

Regards!
 
Messages
60
Country
argentina
Ohh great, I was thinking about redoing the whole fuselage because I think it's not to "efficiently" made and I had in mind something similar to that, just make a plane with shape of the nose and then extrude it. Will try and report my progress ;)

EDIT

Started redoing the fuselage, so far looks more tidy, the nose section needs heavy work asi it's the most difficult part of all. Here you can see a first approach of how's it looking. So far it resembles a PA11 jeje

 
Last edited:
Messages
10,088
Country
us-arizona
That one is much cleaner. One important tip if you use auto smoothing (I highly recommend) is that try at all costs to have 4 sided polygons (Quads). You have some triangles and N-Gons (5+ sided Polygons) on your new model. Try to make all the lines continue across. Try to make them all Quads. Its hard to do and sometimes you just cant, but you usually can.

That new technique I pointed you to uses a 'basic mesh' for your base mesh and you use either NURMS subdivision mode or TurboSmooth to check and finally create your finished mesh. You can activate NURMS mode with a key input. Mine is set for Shift-N. Here is one of my latest.

I use NURMS quite a bit (only) and I am careful not to accidentally collapse the stack. Keep saving up in huge numbers in case you make a mistake. Adjusting the lines small amounts will make tons of difference on the 'smoothed' version. I also use Symmetry to create the mirrored opposite side and you can make that visible to check your work. Always keep checking your work, seeing if you are going in the right direction. Also take breaks so you can come back and see it with fresh eyes.

uaheoruibhver.JPG
rtwryn.JPG
wargaeth.JPG
SunFlyer_o2i9og.jpg
 
Messages
10,088
Country
us-arizona
One more view, showing the smoothed mesh in Max. This is in a primer gray color which helps to see wrinkles and abnormalities. Note that I created some helper Splines (yellow curved things) that I made from photos of front or rear views that helped me to shape the model. The Splines are super helpful for templates. I recommend reading in the Help section on how to make Splines and make them Bezier with the adjustable handles. Get good at making templates as they are immensely helpful. With good templates, you will have better model shapes.


awergerg.JPG
 
Messages
10,088
Country
us-arizona
Note that the gold version is in Max, a rendering, not in FS. It is also a Poly-Monster. Not good but I like my planes to be super smooth and rounded, as perfect as possible. A high price...
 
Messages
60
Country
argentina
I get your point, and that's what I tried on the v2 fuselage. The problema is that I get that hard edge on the side but I think that one of the edges is diagonal. I'll work on that.

EDIT

So here it is a tidier mesh. However, when I apply MeshSmooth, the model ends up looking more like a Cirrus than a Comanche (like too round edges). I need help on keeping the edges a bit more sharp. Maybe, after I apply Mesh or TurboSmooth, I have to re-arrange polys to the desired form? I think this is too much work. I'm now reworking the front of the cowling though
Anyways here are some images.


Last edited:
Messages
10,088
Country
us-arizona
The technique requires edges or radius' that need controlling use controller loops. This is a second or third 'Loop' that is parrallel with an edge. For instance, on the windscreen, you want the lower edge of the perspex to be sharp. So you place or cut a set of edges along side that lower edge line, both top and bottom. You space the Loops away from the edge at the amount you want a radius. So if for instance you want a 1 inch radius on the top and front to curve along that edge, then you have your Control Loops at 1 inch spacing on both sides. If your windscreen had a 3 inch radius curve along the bottom, then you would space out the Control Loops to 3 inches top and bottom. The curve begins at the first control loop and goes to the second Control Loop.

Works great on scoop intakes as well. Also wing roots, if your plane has one. Brilliant technique. It can almost auto-generate a wingtip via having your Control Loop back about 6 or 10 inches, if your wing is similar to what it can generate. Control Loops control it all....
 
Messages
10,088
Country
us-arizona
I highly recommend spending some time watching Arrimus 3D on YouTube and check out his most earliest tutorials. They are brilliant. Some are not for Max though, so skip those, although they taught me some things, like Z-Brush, how you can manipulate mesh. He shows how to work with Control Loops.
 
Messages
10,088
Country
us-arizona
Here is an earlier plane using this technique. With and without NURMS mode on. Note the control loops on the wing roots.
reteqtbh.JPG
etherwty.JPG
 
Messages
60
Country
argentina
So I need to add edges where abrupt changes in curvature are made. I've also noticed that TS, using this extruding technique, "eats" too much of the edges of the fuselage. So, if I understood correctly that's where I should add extra edges, where the roof becomes the wall, right?
 
Messages
10,088
Country
us-arizona
So I need to add edges where abrupt changes in curvature are made. I've also noticed that TS, using this extruding technique, "eats" too much of the edges of the fuselage. So, if I understood correctly that's where I should add extra edges, where the roof becomes the wall, right?

Yes and Yes.

Use less Polygons in the base structure so that TurboSmooth or NURMS will not get too huge. You can also use only 1 Iteration.

Yes also on the Radius'd edges with Edge Control Loops. Where ever you want to control a curve, if a curve isnt doing the correct thing, then you add a Control Loop.

Note that you can always go back and select Loops and delete them 'after' you have collapsed the stack and your mesh is smoothed. Basically you can reduce the mesh a bit to help cut down on model complexity.
 
Messages
10,088
Country
us-arizona
Also... You might keep your windows in and not delete those. Cut them out instead. That way your curvature stays in the structure.
 
Messages
60
Country
argentina
Okay, great. So far I'm only using 1 iteration, and the result is what you can see. I'll cut the windows open once I have the mesh smoothed out, if not, they will get rounded. I'm off for some sleep, but tomorrow I'll give this thing a shot. Oh, I'd like to know if that half of the plane is hollow (which I guess).
Thanks!
 
Messages
10,088
Country
us-arizona
Yes, hollow. After I cut my windows, I then do a 'Shell' (modifier) and extrude the fuselage interior inwards. This creates the window sill edging all in one hit. Cut the door 'lines' in first so you can detach them later, inside and out.
 
Messages
60
Country
argentina
Here's the result after adding some control loops (with Chamfer tool I added 2 extra edges). I like how it ended up, with much more squared edges, but still rounded and getting closer to the fuselage shape.


As you can see on the next image, the mesh looks more tidy and simple, in my opinion. I used TS and not MS, the latter gives me much more rounder edges. The problem is that the result is, still, smaller that the shape of the fuselage (though much more better than before). Other thing I noticed is that when I copy the other half is even smaller than the "original" half which I copy from.


This was just a quick test to see an early result, much work is needed. I think that I have to separate the new control edges a bit more, that way I think it won't "eat" much part of the fuselage.
 
Messages
10,088
Country
us-arizona
Looking good, Mau!

Remember, you can use Swift Loop to instantly place Control Loops and regular Loops. In Edge Mode, you can use Flow Connect and Set Flow to adjust the radius (curvature) to Loops. You can select an entire Loop quickly by just clicking an Edge of that Loop and hitting your shortcut for selecting Loop, then you can either Set Flow or even delete it by Control/Backspace, which will delete the Loop and its Vertices as well. You should also be able to move them (sometimes). You might check out the Graphite tools tutorials on YouTube. When you have shortcuts for Loop and Ring set, you can really move fast and create precise shapes with great ease.

Its an addictive technique.
 
Messages
10,088
Country
us-arizona
Here are some mesh samples that show you how other people did theirs. These were from TurboMax. Great to study other mesh to see how people figured out edges and corners and sides and things.
7ghiuisuwtbn.JPG
aoienbonb.JPG
49jgnb.JPG
93q8t9q38gh9h.JPG
[
 
Top