• Which the release of FS2020 we see an explosition of activity on the forun and of course we are very happy to see this. But having all questions about FS2020 in one forum becomes a bit messy. So therefore we would like to ask you all to use the following guidelines when posting your questions:

    • Tag FS2020 specific questions with the MSFS2020 tag.
    • Questions about making 3D assets can be posted in the 3D asset design forum. Either post them in the subforum of the modelling tool you use or in the general forum if they are general.
    • Questions about aircraft design can be posted in the Aircraft design forum
    • Questions about airport design can be posted in the FS2020 airport design forum. Once airport development tools have been updated for FS2020 you can post tool speciifc questions in the subforums of those tools as well of course.
    • Questions about terrain design can be posted in the FS2020 terrain design forum.
    • Questions about SimConnect can be posted in the SimConnect forum.

    Any other question that is not specific to an aspect of development or tool can be posted in the General chat forum.

    By following these guidelines we make sure that the forums remain easy to read for everybody and also that the right people can find your post to answer it.

Blender My Blender2MSFS settings for emissive texture alone and under glass panels. Glass settings included

Messages
195
Country
us-california
Hey comrades, after many hours of figuring this out and tinkering I thought perhaps I may save someone else the struggle. Getting the emissions to look similar to the ones already in the sim was long an arduous. In real life glass is both reflective and transmissive and trying to recreate that was especially tough. Any window you look at both reflects the world and reveals what is beyond unless it is tinted or very bright outside and dark inside, the one way mirror effect. In the sim i have seen either the glass was transparent or totally opaque. for large airports where treatsments are applied ot glass it looks okay, but small building and small airports, it did not look real to me! Although what I have accomplished still does not look real to me it does look familiar and fits, which is what my goal was. i could spend years and get it right but the framerate would be zero haha. so here ya go, I hope this helps and stay tuned for my KEDU-University Airport release at the end of the month.

SETTINGS FOR BUILDIING EMISSIVE TEXTURE AND WITH GLASS OVERLAY

Surface – bdsf, Christian B

BLUILDING settings Glass Settings

  • Base Color albedo-detail mix white
  • Meta 0 0
  • Spec .012 1
  • Spec tint 0 0
  • Roughness . 766 0
  • Set zero for anisotropic through clearcoat roughness
  • Clear coat R . 055 0
  • IOR 1.450 149.8/150
  • Transmission 0 1
  • Trans. Rough 0 0
  • Emission emissive detail mix hsv=0-0-0-1(apha)
  • Normal Norm map node alpha multiply
  • Alpha 1 multiply
  • Clearcoat N default
  • Tangient default
MSFS STANDARD MSFS GLASS

  • Alebedo color HSV 0-0-1 HSV 0-0-1
  • BLDG Emissive Color w/o glass overlay HSV = 0-0-.814 w/glass overlay HSV = 0-0-.35
  • GLASS emissive color HSV= 0-0-0
  • Alpha Multiply .55 .12
  • Day night yes yes
MATERIAL PROPERTIES

Rough scale though Blend threshold all 1.0

Double check the nodes in shading that “emissive tint” for building reads 0-0-.814 if you do not have glass panels overlaying the texture and settings of 0-0-.35 if you do have glass panels overlaid, here is where you may change the HSV to tint your imissions but leave the 3rd value as stated above. Also not on your texture map use white and grey and black that way the white areas will get tinted as expected. On emissive tint mix I left everything alone.The reason is, the glass panels, in order to provide reflection during the day or rain etc, they absorb or deflect some of the emission value at night. In my attached examples the building on the left does not have any glass panels whereas the small one on the right does. End result, at night they both emit the same amount of light.
I hope this save someone all the hassle I went though :)
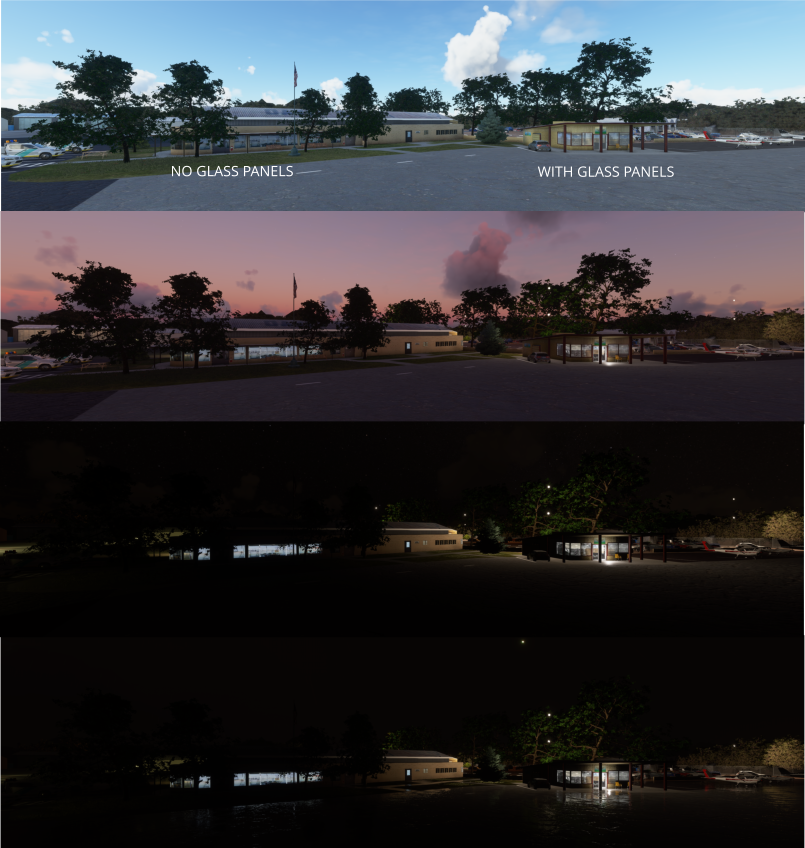
EMISSION EXAMPLES.png
 
Messages
204
Country
us-texas
Thanks for the detailed info Av8rThor, you did a good job on the lighting. I'm sure when I get to my lighting, your posts will help immensely. It is good we help each other out, because there is so many nitty gritty details in this stuff that can just kill our time value in trying to get product finished. Thanks again...
 
Messages
233
Country
canada
can you elaborate about what exactly do you mean by glass overlay? Is it a plane or face on top of another face with the behin the glass texture? How exactly do you structure object for windows?
 
Messages
195
Country
us-california
Yes I used a texture for the "background since i did not model the buildings interior. So I put a "plane" just in front of it (almost touching) as a glass texture with mild refractive and reflective parameters so it looks like glass when the sun hits it etc. However that said, I am going to try and PBR the whole building instead of the current hand uv texture. In that case, I would punch a hole in the wall (inset with face remove)and put a glass panel with 80 to 100 % reflectivity. I will try and do the inset first and seelct the "face" and try and make that glass first If I a less than 100% reflectivity i would use a dark dark grey as the albedo... similar to what nsfs usesmsfs glass.png see thumbnail.
 
Messages
233
Country
canada
Interesting. I was thinking about doing PBR instead of baked-in albedo and normal 4K testure. with texture painting. So no baking then? How would you handle all the dirt and stains near the roof etc.? It would look too "clean" if it's all just PBR textures. Baking 4K textures takes a lot of time an effort, and I only do albedo and normal, so I lose the other stuff (I set metallic and other with sliders). So just doing PBR textures is very tempting. But the slight grime would be nice...
 
Messages
195
Country
us-california
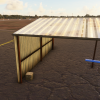
What I am doing now (trying) is a pbr texture to build it. bake the textures down to metal, albedo, roughness, normal and a/o. I us materialize to get the a/o roughness and albedo into a rgb picture. Then in my art program, I open up the albedo and paint in dirt etc. This painting only for building close to where an airplane may be going. Back in blender using msfs properties I attach the albedo, rgb and normal for output... haven't ried the detail textures yet. not sure hwo that works but may be a great way to overlay dirt and grime, But since I am drawing that on the albedo anyway the only advantage i see is the ability to change the blend or mix of it. I will attach my first building down the way I just described. I got the grim in, change the color of the walls (tint option in blender msfs node and some albedo work) added grime to the bottom, a bit of a/o added to corners and rust on the roof. In blender i also had to pump up the normals a bit since i drew so much on the albedo. I using a program from xara... it is vector based and easy but extremely pwerfull. INHO blows photoshop and gimp out of the water but i still use gimp for quickies.

shed_03.png
 
Messages
233
Country
canada
Ah, so you still do baking. What size are you using for baked textures? I found out that 4096x4096 is the only one that has a good enough quality. I settled on doing just Albedo and Normal, and I just use sliders for metallic/roughness/sheen etc. Didn't want to use too much large texture files. But I'm curious to what others are doing, as there are no guides or tutorials that explain the optimal way to work.

I actually do all grime etc. right in Blender now - in texture painting mode I paint right on top of the model. Because in the Photoshop when I see Smart UV mapped texture it's not clear where is top and bottom of different parts, and which way roof panel is pointing. It gets impossible on more complicated models to guess right on the first try. So had to redo several times in Photoshop until I got it right. But in Blender you paint right on the 3D model. I added a few textures with spots Very fast and n

Here is my workflow right now, all advise appreciated:

- I create the model
- I use BlenderKit addon for assigning PBR materials to faces (plus some custom PBR materials, converted in Substance Painter and edited).
- Create and assign glass material for windows, sometimes parallax, other times simple glass (here's where your experience is helpful)
- Copy the model, create new empty material and assign to it
- Bake into 4096x4096 images for Albedo, and same size for Normal (should I use less?), then plug those 2 images for MSFS material and adjust sliders for the rest. Save baked images and make a backup(!)
- Texture paint in Blender with grime, spots, rust streaks textures with mix, overlay, screen modes and different brush sizes, just a bit of transparency, rotating the model and applying as required
- Export model plus all extras in separate objects (drains, AC, wires, antennas etc.) as x00 LOD and just the model as x01.

Where did you get such a nice corrugated metal PBR material? I like it, need something like that for my next airport...
 
Messages
195
Country
us-california
Interesting. I was thinking about doing PBR instead of baked-in albedo and normal 4K testure. with texture painting. So no baking then? How would you handle all the dirt and stains near the roof etc.? It would look too "clean" if it's all just PBR textures. Baking 4K textures takes a lot of time an effort, and I only do albedo and normal, so I lose the other stuff (I set metallic and other with sliders). So just doing PBR textures is very tempting. But the slight grime would be nice...
I read your post and you are doing what I was/am. I call it sorta pbr. if you are using albedo and a normal, that is (normalMap) PBR, just not fully implemented. I have learned after using extremePBR and texturing a model, my shed. I can bake all the maps in about 5 minutes. Albedo (use the emit node for better color). My first building, I textured with 2 k textures and with baked a/o overlaid. Then I started baking a modified albedo (b&w with smooth surfaces black) to use for a normal map, with poor results. So off to full pbr I went. The one critical step in baking the diffuse/albedo in blender (node wrangler enabled) is to control shift click in node before the bdsf (spelling) and bake an emissive texture, nit near as dark. To bake a metal map, Injust swan the metal output into the roughness input and bake a roughness map, making sure to save with the metal name. After all they are both just black and white. My biggest issue is materialeren, where I make my rgb. It seems to apply either to much metal or too much smoothness. It’s the node, it says smoothness not roughness so I am 7nsure if I should just take a roughness map and invert it for materialism but Because the blender2msfs node rgb is a roughness channel I haven’t done that. Suffice to say no matter what route we take it is time consuming so I reason, take the route that nets the best results For that mission. My distant buildings, no pbr at all. If you seen my pictures showing two yellow buildings, the foreground slanted roof is sorta pbr style the one to the rear, albedo only.I’ll attach an earlier version, where both buildings were albedo only, now tge one on the right is upgraded. A good picture of it is in my emissive settings post.
49139B2F-E5A6-40C4-AC7E-2C93223EC334.jpeg
 
Messages
195
Country
us-california
Your workflow is similar to mine. My textures are from extreme pbr, really makes it fast. One click. I have yet to figure out how to texture paint (custom brushes) so that it looks good. That would save a ton of time for me. Btw that second model bake to from is a waste of time. Deselect from selected to active. Put a blank texture node in the shader. Make a new 4096 square file called bake results in the texture window linking that node to it.. Make sure it is highlighted along with corresponding model. To bake multiple models on same sheet, put a texture node in each models shader, making sure its highlighted and select all (models). Bake tmap of your choice. Save (results) image as whatever, bake next one right inntop of that same bake results and save as etc. very fast this way.
PBR Workflows
make model complete Glass too
assign textures and glass parameters
lay out UVs and adjust scale of texture through the shader, not the uv, I adjust that only for placement and keep to scale.
bake diffuse (emit node), ambient occlusion, roughness, normal and metal (through roughness node)
import a/o, roughness and metal to materialize, create rgb and save
doctor albedo with graphics software for grime etc. (note I lay out my UVs so they make sense)
plug in diffuse/albedo (doctored), rgb and normal into msfs materials
preview and 3xport.

TEXTURE workflow.
make model
Prep UV and export UV layout
assign white texture and bake ambient occlusion and save 4096
texture UV export with albedo textures, overlay ambient occlusion and use in program tools (shading etc)
Save as albedo
save modifued Albedo, black and white (for materialize)
make normal in materialize.
in blender plug in albedo and normal into msfs properties, adjust metal and rough sliders and export.

my pbr looks better and I am still learning it, it took me three days to nail it down. I think Nnow I could build that hanger from scratch in a day.
my Texture process is about 1/2 to 2/3 the time. I woukd guess that I after I figure out texture painting that will be my route, pbr texture, for Imoortsnt buildings anyway.
 
Messages
195
Country
us-california
Another thing, wouldn’t it be simpler to make all objects as one model export lod using the groups as lod01 lod00 etc in the 3xporters. I ask because I have done any lod yet
 
Messages
195
Country
us-california
For simple buildings, I use orthographic view and then do the UV project from view, then I rotate the building (wo zooming-for scale sake) and do it again and again and again and then place them do they make sense and small as a group. In the node editor you can add a node that is a size scale and vector node, I put that right at the very beginning just after the first extreme pbr node where all the noodles come to a point on the left side, i use this node to scale the pbr. You don’t see anything really happen except in the viewer the textures change scale. I have a post somewhere here on the board where I show my UV layout. then I just color away on it.
 
Messages
195
Country
us-california
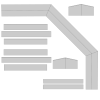
here is an outlying building, it will never bee seen close up so I didn't bother with pbr. The layout is obviosu to me what I am looking at, bottom is front, in the two next to each other bottom is lower right west face just above it is lower right east face. top right is top left west face. it all makes sense to me and i jot down a few notes to not screw it up.

UV export
LARGEhangeRuv LAYOUT.png

albedo export (texture map used in sim) with all texturing done in a graphics program - the color away part :)

largehanger.png

the finsihed model as seen in Blender

large hanger.png
in the sim (on the right behind trees)

building behind trees.png
 
Messages
233
Country
canada
Thanks! One more thing - can you post a screenshot with the scale node and how you plug it? It would be much easier than trying to reinvent it...
 
Top