• Which the release of FS2020 we see an explosition of activity on the forun and of course we are very happy to see this. But having all questions about FS2020 in one forum becomes a bit messy. So therefore we would like to ask you all to use the following guidelines when posting your questions:

    • Tag FS2020 specific questions with the MSFS2020 tag.
    • Questions about making 3D assets can be posted in the 3D asset design forum. Either post them in the subforum of the modelling tool you use or in the general forum if they are general.
    • Questions about aircraft design can be posted in the Aircraft design forum
    • Questions about airport design can be posted in the FS2020 airport design forum. Once airport development tools have been updated for FS2020 you can post tool speciifc questions in the subforums of those tools as well of course.
    • Questions about terrain design can be posted in the FS2020 terrain design forum.
    • Questions about SimConnect can be posted in the SimConnect forum.

    Any other question that is not specific to an aspect of development or tool can be posted in the General chat forum.

    By following these guidelines we make sure that the forums remain easy to read for everybody and also that the right people can find your post to answer it.

MSFS20 Blender2MSFS support thread

Status
Not open for further replies.
Is anyone getting an issue where their objects appear only when up close>? The missing hangars appear when getting up close.
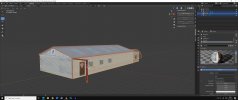
DYTmissingbuildings.png
 
Sorry if this has been covered somewhere, I have been able to export my model from 2.9 into a dummy folder just to make sure I'm getting what I should, in a nutshell within a dummy projects folder I am getting a .bin file, ,gltf and an xml. I also get a separate Texture folder which contains the textures. I tried following a tutorial that was very early on in this thread but to be honest I couldn't hear what was being said and found it difficult to follow. I have already removed the various hangers that microsoft placed by following Flying Thestons excellent tutorial, now my question is, are there any other tutorials showing how I do the export for real, I suspect it is into one of the folders created to start my project. Any help on this would be greatly appreciated, sorry for the ramble, it's the age and lockdown
 
There is a PDF someone wrote, I don't have the thread on me. I followed the PDF is how I learned, your right the tutorial was difficult to hear.

Folder structure and directory names are important. It should just use the GUID and not care about anything else, but that's just not how Asobo designed it to work. Make sure you copy the sample project and just change the XML file, dir names, and everything must be the same name. You must change some names inside the XML itself as well, consult the PDF (it's in one of the main threads in here in the Blender section, you'll find it if you browse the forum). When exporting, follow our previous notes about "gotchas", make sure you have selected items export checked in the MSFS exporter utility during the final export. Don't try exporting multiple objects at once. Make sure the XML file and dir name under modellib and the actual GLTF filename all match, 3 names must match here. The filename you use in Blender to save the .BLEND file does not matter, some people said it does, but it does not (have exported over 100 items now).

There is a rare caching issue where some items may refuse to export or update after exporting, resetting / rebooting does not fix it initially. There is at least a couple of Blender bugs that if you accidentally change certain things by hitting various hotkeys accidentally, the exporter may fail. This is rare and happened to me maybe 4 times out of 100, but it can happen.
 
Last edited:
Thank you @AlpineScenery I'll try searching for that PDF. My object is made up of 3 elements, Roof, Hanger ang guttering. I selected all in object mode but I don't get green as you have said, as you can see from the attached screenshot. All of my textures are either square or oblong 2048x2048 or 2048x1024 etc
 

Attachments

  • selectedobject.jpg
    selectedobject.jpg
    337.4 KB · Views: 246
Join your 3 objects before exporting (CTRL-J), then try again. Once done exporting, just undo to unjoin them if you want to leave them separate to be easier to work with in blender.
When joining, you may have to reassign / recreate the materials.
 
Awesome, I will have to try that. I have painted textures on double side but 5hey leak through
Unfortunately you were correct...After a more thorough investigation in Blender it seems my object has already embedded in its mesh a duplicated plane placed just tenths of millimeters away from the other.I discovered it trying to edit the object by removing some of its faces.All faces are doubled.It was an object I downloaded for free from Turbosquid so I was unaware it was designed like this!
 
Unfortunately you were correct...After a more thorough investigation in Blender it seems my object has already embedded in its mesh a duplicated plane placed just tenths of millimeters away from the other.I discovered it trying to edit the object by removing some of its faces.All faces are doubled.It was an object I downloaded for free from Turbosquid so I was unaware it was designed like this!
You can try using the Mesh > Cleanup > Merge by Distance Option
 
@AlpineScenery tried joining before doing the export but I still have an orange line around the model not green?
If the line is around your new joined object as if it's one single object instead of 2,3 e.t.c. and in the list appears only 1 model instead of 3 you're good to go.It's orange in mine too not green.Probably it depends on Blender versions.
 
It depends on the theme you choose in Blender, just a different theme, I am used to a theme that uses green for object mode.
 
@AlpineScenery tried joining before doing the export but I still have an orange line around the model not green?
to be very simple. select all then ctrl a i then scale and use the pop up at the bottom and include distance and rotation. Then select all again (it does not have to be a single object. one of mine is 7 objects, no problem) just to be sure and export. I use a working directory to save to and if all looks good, I put the the three model files in airport/packagesources/modelLib, then I place all the textures in airport/packagesources/modelLib/texture. Make sure the blender references the image textures correctly to what you are actually using! Blender often appends a tag of. 001 or .002 (metal_rust.png.001) if you are doing a lot of work in there. Make sure the filename and the xml name are identical upon export as well as generate guid, tick every box you can except LOD (if u are not using that) and tangents (msfs isn't using it right now and it just causes error messages) see picture insert for settings. Another tip, use the "fspackagetool.exe" tool by dragging your xml file to it to build the package,. after it builds (hopefully sucessfully) copy your compiled project into your communities folder
"C:\Users\YOU\AppData\Local\Packages\Microsoft.FlightSimulator_8wekyb3d8bbwe\LocalCache\Packages". (YOu being your comp. username) When you start the game you don't have to build anything, just open the xml file and open scenery, find your model and place it. This is very handy if you update a model, you can then just run the game (after doing the above) and see the changes without loading scenery etc. I also use the "fsdevmodelauncher.exe" tool to access the game faster (bypasses all the startup screens)
blender_settings.png
 
Last edited:
I've got the model and the textures to export into my /packagesources/modelLib folder but when I build the package in MSFS i don't get to see it but get loads of errors, not finding stuff, what's odd though is the packages folder has created a folder with airport then below that a content info folder and a scenery folder then below that a mycompany and a excludes.bgl which I created, then within the mycompany folder is a modellib.bgl and a texture folder that contains all of the textures that have now been amended to .png.dds and json files.

talk about confused
 
Ok, use the external tool to build the package, trust me much faster. You don’t see it in the game way you are doing it do to glitches and the fact that your communities folder may nit match what you are doing. Another quirk with building in game. After you build it, you have to quit and restart the game to see it, hence the external too. If you do it externally then start the game, The model should be there. A quick check to see if it worked prior to starting the game is to open your airport then package/texture/... now I can’t remember I think it’s world then texture again. If your texture images are in there, two Files for each image, it worked. Copy package to the community folder, it just keeps things simple. Try that... trust me that external build tool is a lifesaver!
 
O.k. this is where I start to be confused also...You guys use an "airport" project to place your custom object into??Because I placed them inside a "simple scenery" project.Only thing is if I place additional objects in the folder structure after the project been built I'm unable to see the additionals in SDK object list.Thus,should I want to insert new objects in the sim or even change something previously placed i.e. an object correction,I must make a new scenery project and follow the usual procedure from the start.
I tried to make things work placing my custom objects inside an airport folder structure however nothing appeared in SDK object list.
 
To be clear I use airport if I’m rebuilding the entire airport. If I’m just going to modify the outlying areas in a scenery project is fine. If you’re going to do the airport route you need to go into the sample folders and copy the section from the scenery xml parameters file into the airport data folder so that it will recognize scenery. There is a YouTube description on how to make an airport file made by flyingTheston. it’s a lot to go into here but you make your project folder name it after the airport CSFO and then you inside that he have your various folders including model library‘s textures etc.. when you build the project it will save it into a folder called projects. every time that you adjust your model or change the textures you replace the model library files with the appropriate new files and then rebuild your project using the external tool. It will update that project folder which you can then copy into your community folder. When you start the game the changes will be already there. If it is a new model that you’re adding it will be in the model list.
 
To be clear I use airport if I’m rebuilding the entire airport. If I’m just going to modify the outlying areas in a scenery project is fine. If you’re going to do the airport route you need to go into the sample folders and copy the section from the scenery xml parameters file into the airport data folder so that it will recognize scenery. There is a YouTube description on how to make an airport file made by flyingTheston. it’s a lot to go into here but you make your project folder name it after the airport CSFO and then you inside that he have your various folders including model library‘s textures etc.. when you build the project it will save it into a folder called projects. every time that you adjust your model or change the textures you replace the model library files with the appropriate new files and then rebuild your project using the external tool. It will update that project folder which you can then copy into your community folder. When you start the game the changes will be already there. If it is a new model that you’re adding it will be in the model list.
So,if I place my custom objects according to the described way inside an already made airport project and then rebuild the package,the objects will normaly appear in the SDK list?
 
In a nutshell: if you want to animate multiple parts, you need to create a Non-Linear-Animation (NLA) group for them. The easiest way is to finish up all the keyframes (editing later on is a bit complicated)
This works as described, but now I find one of my animations is a bit off -- how can I get it out of the group to fix it and then get it back in again?
 
|no, you put your objects into the modelLIb and use the external tool to build the project then copy project file into community folder. The tool complies your modellib into files in the following folder

airportname/Packages/airportname/scenery/global/scenery/TEXTURE
you will see
texture.png becomes texture.PNG.DDS and texture.PNG.DDS.json

you will not see the model name anywhere unless you notepad+ open one of the files, but if the textures are there then the model is, what you selected and exported anyway, one time i screwed up and just one way was there :)
just drag the xml file onto the tool (fspackagetool.exe), and wait.. it takes a little to get started, (you may get failure message but at the bottom it will say success and failures. if failures is zero you are good, if not look for what failed it get pretty descriptive) when done press anykey and then copy project-airportname from the Packages folder to the community folder... see attachment

Screenshot (320).png
 
Last edited:
I wasn't aware of this fspackagetool.exe tool untill now.Is this an external compiler so there's no need to complile/built the package from inside dev mode in the sim?And which .xml we compile with it?The primary xml found below Packagedefinitions & PackageSources folders?
 
Status
Not open for further replies.
Back
Top