• Which the release of FS2020 we see an explosition of activity on the forun and of course we are very happy to see this. But having all questions about FS2020 in one forum becomes a bit messy. So therefore we would like to ask you all to use the following guidelines when posting your questions:

    • Tag FS2020 specific questions with the MSFS2020 tag.
    • Questions about making 3D assets can be posted in the 3D asset design forum. Either post them in the subforum of the modelling tool you use or in the general forum if they are general.
    • Questions about aircraft design can be posted in the Aircraft design forum
    • Questions about airport design can be posted in the FS2020 airport design forum. Once airport development tools have been updated for FS2020 you can post tool speciifc questions in the subforums of those tools as well of course.
    • Questions about terrain design can be posted in the FS2020 terrain design forum.
    • Questions about SimConnect can be posted in the SimConnect forum.

    Any other question that is not specific to an aspect of development or tool can be posted in the General chat forum.

    By following these guidelines we make sure that the forums remain easy to read for everybody and also that the right people can find your post to answer it.

MSFS Blender cloth simulation baked to bones

Messages
149
@karlo922, I was too impatient to wait for the script, even though the armature for my flag has 231 bones. o_O I have created the bones and the vertex groups, and assigned the bones to the vertex groups. I am a bit unclear on the next step. It looks like baking the animation wipes out the connection between the bones and the vertex groups. So as @clements noted, that means repeating the inverse kinematics step for every animation I want to create. I think I should wait for your script at this point. Otherwise, I may literally lose my mind.
 
Messages
233
Country
canada
@RomanDesign, just looking at it in blender, I'd apply all transformations (CTRL-A) to the Armature. It's x rotation is 90 degrees and its scale is 0.100 on all axes. I suspect this is the main issue.
Thanks, I think I tried that and it only distorted everything more, even in Blender, but I'll try again...
 
Messages
171
Country
germany
Hi all,

after clements has given me some hints I now can share the scripts I wrote.
Always do a backup of your model before using them! I cannot guarantee they work for every possible way to model something. They are really simple and do not cover "faults" or whatever.

I put a README file in the zip, make sure you read it carefully. Content is also here:

00_Flag_Python_AssignVertexGroups.py
------------------------------------
This script will iterate over all vertices of the plane, starting top left and ending bottom right.
It will add vertex groups with name 1, 2, 3.... to each vertex.

Usage:
CAUTION:
- It will round the coordinates of your plane slightly (to 3 decimal places) so it slighlty changes the size (but really minimal)
- It will only work if your flag-plane is using XZ-Plane!!!
- Make sure to apply scale before using it!

Then, just select your plane in OBJECT Mode and start the script


01_Flag_Python_AssignConstraintsToBones.py
------------------------------------
After you added all bones like described from Mikea.at, this now will add the IK-constraint of each bone to the vertex groups.

Usage:
- In the first to lines, change
-- NameOfTarget = "FlagPlane" # insert Target object name (e.g. the flag plane name)
-- NameOfBone = "Bone" #insert name of bone (if you changed the default name "bone" of the armature to something else)

Then go in "pose mode" of the armature, select all and start the script


02_Flag_Python_AssignBoneGroupsToVerticesWeightPaint.py
-------------------------------------
This now does the weight painting after you baked the animation and parented the armature to the plane.

Usage:
Just select the plane which is parented with the armature and start the script
 

Attachments

  • FSDeveloper_karlo922_Flag_BlenderScripts_v2.zip
    3.3 KB · Views: 336
Last edited:
Messages
149
Sorry to be a clueless newb, but how do you run a script in Blender? I opened the Scripting Workspace, opened the python file in the editor, then clicked on the Run button. All I get is: "Python script failed, check the message in the system console." But I see no message in the console.
 
Messages
149
Never mind. Got it to work. In your instructions, you say that NameOfTarget should be set to the target mesh name. Actually, it should be the target object name. The Plane object contains a mesh, but the script is looking for the Plane object, not the mesh inside the Plane object. For example, "Flag_cloth" is the correct string to use for NameOfTarget in this file:
blender_DUO9Q0OwiD.png

When I changed this in the script, then it worked perfectly. Thank you!
 
Last edited:
Messages
149
What is the trick to the weight painting step? The "02" script doesn't seem to do anything. And if I try to do this step manually, following Mike's instructions from the beginning of this thread, it doesn't work. Shift-Click on a bone does nothing. Clearly I missed something essential.
 
Messages
149
More progress. The step in Mike's instructions to parent the cylinder to the armature was not clear to me. What he failed to say was that you have to select the cylinder (or in our case the flag plane), then shift-click to select the armature, then hit Ctrl-P to bring up the menu that let's you select "Armature Deform With Empty Groups". If you do THAT, then the "02" script will work at designed.
 
Messages
149
If I want to create multiple animations for different wind speeds, which of the scripted steps need to be repeated for each animation?
 
Messages
171
Country
germany
If I want to create multiple animations for different wind speeds, which of the scripted steps need to be repeated for each animation?
I wrote this for myself:


---------- start and animation 1 ---------------
- Create the plane of the flag, rotate so that it using XZ plane
- make sure the left edge / the attach position of the flag is at "0 / 0" so that a rotation around "Z" axis will rotate correctly according to wind
- Place it where it is needed APPLY ALL TRANSFORMS (rotation, scale, location) now!!!
- Subdivide as much as needed
- Add Vertex Group at left edge -> name it "Pinned"
- Apply Cloth modifier
- Add Wind
- Tweak Cloth until wished result
- Select Flag-plane and go into Object mode
- Start Script "00_Flag_Python_AssignVertexGroups.py"
- Create bones for each vertex point, starting top left, ending bottom right
- Go into Pose Mode of Armature
- Open AND EDIT Script "01_Flag_Python_AssignConstraintsToBones.py" -> Include name of target plane object
- Start script
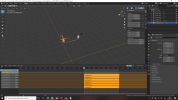
- Set Timeline to "0", Start 0, End 0 -> Default_State
- Apply Baking simulation to bones,
- in "Dope-Sheet" "Action Editor" select keyframe, and copy it
- insert copied keyframe at position "1" and "2"
- "push down" and create NLA track
- duplicate Plane, name it "_anim" (so you now have 2 planes), remove Cloth simulation from "_anim" plane
- Move former plane to a new "collection" (to be able to fully disable it while working) -> we will do the cloth simulation with it
- Parent new plane with "empty groups" Armature and Flag Plane
- Select Flag plane in object mode
- Start Script "02_Flag_Python_AssignBoneGroupsToVerticesWeightPaint.py"
- Open "NLA Track" Editor, rename both parts to "Default_State"

----------- animation 2 and following ----------
- only show "cloth" plane, disable "_anim" plane
- tweak cloth simulation as needed
- Find perfect part of animation loop
- Go into Pose Mode of Armature, select all bones
- Start script "01_Flag_Python_AssignConstraintsToBones.py"
- Set start and End of timeline to "perfect" loop
- Apply Baking simulation to bones -> dope sheet - action editor -> rename track -> "push down" and create NLA track
- rename NLA Track, reorder NLA track if needed
- disable "work" collection
- Parent new plane "_anim" with "empty groups" Armature and Flag Plane
- Select Flag plane in object mode
- Start Script "02_Flag_Python_AssignBoneGroupsToVerticesWeightPaint.py"


- Add axis and parent all
- Export
 
Messages
149
I am attempting to create a flag with different waving animations depending on the ambient wind speed. The approach that everyone seems to be using was borrowed from various windsock Simobjects. The basic structure of the animation code is:
XML:
<Animation name="Knots_00" guid="xxx1" type="Standard"/>
<Animation name="Knots_05" guid="xxx2" type="Standard"/>
<Animation name="Knots_10" guid="xxx3" type="Standard"/>
<Animation name="Knots_15" guid="xxx4" type="Standard"/>

<AnimGraph>
    <DefaultState name="Anim"/>
    <BlendTreeState name="Anim">
        <Animations>
            <Animation guid="xxx1" loop ="True" speed="1" threshold="0"/>
            <Animation guid="xxx2" loop ="True" speed="1" threshold="5"/>
            <Animation guid="xxx3" loop ="True" speed="1" threshold="10"/>
            <Animation guid="xxx4" loop ="True" speed="1" threshold="15"/>
        </Animations>
        <Value>(A:AMBIENT WIND VELOCITY, KNOTS)</Value>
    </BlendTreeState>
</AnimGraph>
The problem with this approach is that it appears to be using a Blendtree to blend together all of the animations in proportions that are dependent on wind speed rather than playing a single animation that is selected by wind speed. This works fine for a windsock, since the various animations can be rationally blended together to create intermediate states. But the waving motion of a flag is semi-random, and blending together a slowly flapping flag with one wildly whipping around in a heavy gale does not yield a plausible intermediate state. What we need is an animation selector rather than an animation blender. Unfortunately, I cannot find anything useful in the current SDK documentation regarding the sort of animation code that we can use here.
 
Messages
766
Country
italy
I am attempting to create a flag with different waving animations depending on the ambient wind speed. The approach that everyone seems to be using was borrowed from various windsock Simobjects. The basic structure of the animation code is:
XML:
<Animation name="Knots_00" guid="xxx1" type="Standard"/>
<Animation name="Knots_05" guid="xxx2" type="Standard"/>
<Animation name="Knots_10" guid="xxx3" type="Standard"/>
<Animation name="Knots_15" guid="xxx4" type="Standard"/>

<AnimGraph>
    <DefaultState name="Anim"/>
    <BlendTreeState name="Anim">
        <Animations>
            <Animation guid="xxx1" loop ="True" speed="1" threshold="0"/>
            <Animation guid="xxx2" loop ="True" speed="1" threshold="5"/>
            <Animation guid="xxx3" loop ="True" speed="1" threshold="10"/>
            <Animation guid="xxx4" loop ="True" speed="1" threshold="15"/>
        </Animations>
        <Value>(A:AMBIENT WIND VELOCITY, KNOTS)</Value>
    </BlendTreeState>
</AnimGraph>
The problem with this approach is that it appears to be using a Blendtree to blend together all of the animations in proportions that are dependent on wind speed rather than playing a single animation that is selected by wind speed. This works fine for a windsock, since the various animations can be rationally blended together to create intermediate states. But the waving motion of a flag is semi-random, and blending together a slowly flapping flag with one wildly whipping around in a heavy gale does not yield a plausible intermediate state. What we need is an animation selector rather than an animation blender. Unfortunately, I cannot find anything useful in the current SDK documentation regarding the sort of animation code that we can use here.

IT IS actually an animation selector, I can't see any "blending" at all between different animation,
I create four different animation and I called the group windSpeed_blend (attached another object, a simple meteo station, but with the same logic)

the code says: given the Value, in this case AMBIENT WIND, play first animation guid from the indicated threshold (in you code 0 to 4 first animation, 5 to 9 second animation etc)

If you want to blend animation, you need to make them as similar as possible to the previous and the next one
But you can make totally different animation of course, and you will see your object jumping from one to another, no "blending" at all!

if you want some free flags i shared some on the forum! (made them in blender, no luck in exporting in FS without distorsion, therefore exported in fbx, imported in 3ds and exported with babylon...this is the thing that does the magic, unfortunatly my 3ds trial version expired so no way to make more bone animation now)
 

Attachments

  • Screenshot (45).png
    Screenshot (45).png
    746.3 KB · Views: 181
Messages
149
When using BlendTreeState, I am seeing a mashup of the animations. I googled the term BlendTree and found documentation on Unity's website explaining that a BlendTree blends, or interpolates, between multiple animation states. I know that we are not working with Unity here, but MSFS has no documentation on this at all. So I am going with what tiny shreds of information I can find.

And thank you for the free flags, @mamu. Unfortunately, they did not suit my purpose. So I am trying to create my own.
 
Last edited:
Messages
171
Country
germany
When using BlendTreeState, I am seeing a mashup of the animations. I googled the term BlendTree and found documentation on Unity's website explaining that a BlendTree blends, or interpolates, between multiple animation states. I know that we are not working with Unity here, but MSFS has no documentation on this at all. So I am going with what tiny shreds of information I can find.
Hi,
I also think the animations are blended into each other - for me the outcome was okay, but I'm also interested if you find a real solution!
 
Messages
149
I found a possible way to swap animations without blending, using the code in the Bear SimObject that swaps between Idle and Walking. But I did not like the result. The swap did not happen at the wind speed that I selected, at certain speeds it tended to jump randomly back and forth between animations, and most importantly the switch between animations was visually very jarring and abrupt. Bottom line is that even though the BlendTree can make things look a little mushy and distorted at times, it is way more convincing. So I have decided to stick with the BlendTree method outlined above.
 
Messages
149
@karlo922, now that I have successfully created an animated flag that responds to both wind speed and direction using your amazing scripts, I decided to write down my own step list, starting with the excellent notes that you provided above. I recorded my entire process in the attached PDF. I should note that there are a few things I did differently:
  • I found it very helpful to include a flag pole in the scene with collision detection enabled. Even if you export the flag without the pole, the flag animations will behave as if there is a pole.
  • As far as I can tell, you only need to run script "02" one time. No matter how many animations I create and no matter how many times I run script "01" to reconnect the bones to the original flag plane, the weight painting that script "02" uses to pin the flag_anim plane to the armature seems to persist. I created multiple animations for my flag and never had to run script "02" a second time.
  • I ran into some pretty ugly visual artifacts in MSFS when using a simple plane for my flag. Because the plane is exported to MSFS without a true back side, I could see through the front side of the flag in places to portions of its own back side when the flag folded over in the wind, even though the material that I used was configured as double-sided. I confirmed that the collision settings in the Cloth modifier were definitely preventing the cloth from intersecting with itself. In the end, my solution was to use a Solidify modifier on flag_anim to create two perfectly parallel planes 1mm apart. This eliminated essentially all problems with holes in the textures.
  • I included in my step list the creation of the rotation animation for wind direction, based on input from @clements from earlier in this discussion.
I welcome any comments or suggestions on what I did, and I hope that others find the attached document helpful.
 

Attachments

  • Creating an animated flag.pdf
    387.4 KB · Views: 289
Messages
149
If anyone is interested, I have uploaded a small library with three wind-related SimObjects to flightsim.to: a US flag, a windsock, and a garden windmill. All were created in Blender using the techniques discussed in this thread. If I can find the time to do the modeling, my intention is to add more objects to the library in the future. Enjoy!
I just uploaded a new version of the library with some new windsock variants. Hope you like them.
 
Messages
372
Country
austria
@trfsd you could add windsocks without a pole, then the other devs can make a pole and position your windsock to it. With this approach everyone can build the windsocks as accurate as possible using your lib. :D
 
Messages
2
Country
germany
I am trying to use a couple of the tricks mentioned here in order to get a simple bend animation.
  • I have a mesh, where I have applied gradient weight paint from one side to the other
  • 1620982883661.png
  • In Blender, I want to modify the shape with a single bone for simplicity.
  • This works like a charm in Blender, see below. Pure bending bone happiness.
  • 1620983250425.png
  • However, after a few dozen iterations in my main project, I figured thet the core problem I am continuously facing now is, that the gITF export never contains my weight paint as shown above.
  • See below: When I re-open the gITF, it made all my larger-than-zero weights full weighted, which messes up what I am trying to do.
    1620983194256.png
From this thread (initial tutorial & some example files I examined) I noticed that everyone is assigning mesh weights of 1.0 all the time.

Can someone confirm, if this a carved in stone limitation?
If so: Is there any documentation where this is mentioned?
 
Top