Flight file (MSFS)
From FSDeveloper Wiki
Jump to navigationJump to search
| This page is a work-in-progress. Generic message - Please note some detail may possibly be missing or incorrect. |
| Applicable |
|---|
| MSFS2024 |
| MSFS2020 |
| MS Flight |
| LM P3D5 |
| LM P3D4 |
| LM P3D3 |
| LM P3D2 |
| LM P3D |
| FS World |
| FSXSE |
| FSXA |
| FSX |
| FS2004 |
| FS2002 |
| XP11 |
| XP10 |
| XP9 |
Your flight file (.FLT) determines the state of the aircraft (location, switches), world (weather, time, assistance), ui (panels), and the sim in general (speed, traffic, multiplayer) at spawn.
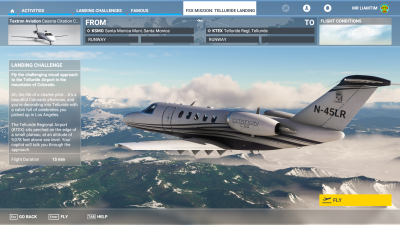
It also determines the mission category and the briefing screen, loading screen, and startup info.
Creating your flight file
- To create your flight file, you start with loading your flightplan or the starting location in the world map.
- Choose a plane, livery, etc. Choose a time and weather.
- Then start your flight.
- Move your plane to the position you want and change it to the configuration you want (switches etc.). If you want to spawn in the air you should stabilize the planes pitch and altitude so the plane is stable after spawn. You should use trim and throttle or autopilot for this. Keep in mind that changing the weather may change the conditions, so configure the weather first.
- If you have the correct configuration, save the flight file with
Escape>Save flight>save .FLT. - You now need to configure the .FLT:
Changes to make in the .FLT file.
[Main]
Add title (e.g. Airline emergency)
Add description/location (e.g. 'LIRN, Italy' or TT:Telluride.Description)
Change MissionType to the category you want your flight to be in (e.g., BushTrip, LandingChallenge, Story Mission, or anything else)
Set StartingCameraCategory. Can be "Cockpit", "Aircraft", "Scenery", "Custom", "FixedOnPlane", "Airport", or "AirportTraffic".
[ResourcePath] and [ObjectFile]:
Change to the name you use for the .xml
Delete [Assistance], [Atc_Menu], and [FreeFlight]
If you use custom weather:
 Set UseWeatherFile=True
 And delete
  UseLiveWeather
  WeatherPresetFile
  WeatherCanBeLive
To remove multiplayer, ai planes, and airport traffic, set:
[TrafficOptions]
AllowAbientVehicleTraffic=FALSE

And add:
[Multiplayer]
Status=0

[Airtraffic]
Status=0
To force a assistance preset, add:
[Assistance]
Preset=ASSISTANCE_PRESET_TRUE_TO_LIFE
NOTE: You can use ChangeAssistanceItemAction to change specific assistance items.
For [GPS_Engine]
Change: Filename= to the name of the .PLN file.
Briefing, and loading screen
In the .FLT file you can add these lines:
[Briefing]
BriefingText=TT:MISSIONNAME.BRIEFING
BriefingImage0=./images/MissionName_Briefing.png

[Loading]
ImageName0=./images/MissionName_Loading0.png
Tips0=TT:LOADING.TIPS.MISSIONNAME_000
Tips1=TT:LOADING.TIPS.MISSIONNAME_001
Tips2=TT:LOADING.TIPS.MISSIONNAME_002
For the TT: explanation, see: Localisation (MSFS)
Pictures
You will have to add pictures for the mission thumbnail, and the loading, briefing, and ending screens.
- The names for the loading an briefing pictures are defined in the briefing and loading sections of the .FLT file.
- The thumbnail will always need to be named:
Activity_Widget.jpg. - The endscreen picture will always need to be named:
rewardscreen.jpg.
Further Reading
The documentation for the .FLT file is pretty complete: Documentation
Pages relevant to mission creation for MSFS.
- Flightplan
- Weather definitions
- Flight file
- Mission script
- Triggers
- Actions
- ObjectActivationAction · DialogAction · AdjustPayloadAction · ChangeAssistanceItemAction · FadeToColorAction · RandomAction · RequestTeleportAction · CountAction · ResetTimerAction · TimerAdjustAction · GoalResolutionAction & SubGoalResolutionAction · GrantRewardAction · PointOfInterestActivationAction · ActivateWaypointsAction · AITakeControlsAction · SendMessageToAIAction
- Mission objects
- Calculator
- Flow states
- Events
- Areas
- Library objects
- Sim objects
- RTC
Click the links to access the topic pages (Default - Opens in same window).

